

Introduction
Do you have a JPG image that you want to use for stitching? Many people face this problem. A JPG file looks good on screen, but it cannot work with embroidery machines. That is where VP3 files come in.VP3 is a special file type. It is used by embroidery machines like Husqvarna Viking. These machines need stitch data, not just an image. So, you must convert your image into the right format.In this guide, we will talk about Converting JPG to VP3 with Software in a simple way. I will share easy steps, tools, and tips that I have used myself. By the end, you will feel ready to do it on your own.
What is a JPG File?
Simple Meaning
A JPG file is a picture. It is one of the most common image types. You can see JPG files on phones, laptops, and websites.
Key Features
- Small file size
- Easy to share
- Good for photos
- Works on all devices
The Problem with JPG
JPG files do not have stitch data. They only show pixels. Embroidery machines cannot read pixels. They need lines, paths, and stitch steps.
What is a VP3 File?
Basic Idea
A VP3 file is used in embroidery. It tells the machine how to stitch a design.
What It Contains
- Stitch paths
- Thread colors
- Design steps
- Machine commands
Why It Matters
Without VP3, your machine cannot work. You must convert your image into this format before stitching.
Why You Need to Convert JPG to VP3
Real-Life Example
Let me share a simple case. I once had a logo in JPG format. I wanted to stitch it on a shirt. I tried to load it into my machine. It did not work.
Then I learned about file conversion. After converting the file into VP3, the machine read it well. The result looked clean and neat.
Key Reasons
- Machines need stitch data
- JPG is not enough
- VP3 gives clear instructions
- Better stitch quality
Understanding the Conversion Process
Not Just a Simple Change
You may think this is a simple file change. But it is not like renaming a file.
What Really Happens
- The image is traced
- Shapes are created
- Stitch paths are added
- Colors are set
Human Input Matters
Most tools need your help. You may need to adjust lines or fix shapes. This makes the final design better.
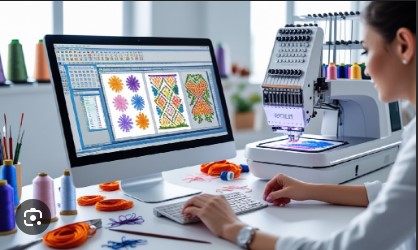
Modern Tools for Conversion
Why Use Software?
Manual work is hard. Software makes it fast and easy. Many tools now offer smart features.
Popular Software Options
Wilcom Embroidery Studio
This is a pro tool. Many experts use it.
Features:
- Auto digitizing
- Advanced editing
- Clean output
My Experience:
I used this tool for a logo project. The result was very smooth. It took some time to learn, but it was worth it.
Hatch Embroidery Software
This is great for beginners and pros.
Features:
- Easy interface
- Auto and manual tools
- Good support
Why I Like It:
It is simple to use. The steps are clear. It helps new users a lot.
Brother PE-Design
This works well with Brother machines.
Features:
- Built-in designs
- Image tracing
- Color tools
Best For:
Home users and small projects.
SewArt
This is a budget-friendly option.
Features:
- Simple controls
- Basic tracing
- Low cost
My Tip:
Good for small designs. Not ideal for complex work.
Step-by-Step Guide to Convert JPG to VP3
Step 1 – Choose the Right Image
Pick a clear image. Avoid blurry or low-quality pictures.
Tips:
- Use high resolution
- Keep colors simple
- Avoid too many details
Step 2 – Import the Image
Open your software. Load the JPG file.
Most tools have an “Import” or “Open” option.
Step 3 – Resize the Image
Set the size you need. Think about your fabric.
Important Tip:
Do not stretch too much. It may ruin the design.
Step 4 – Trace the Image
This is the main step.
- Use auto-trace for quick work
- Use manual tools for better control
My Advice:
Start with auto, then fix details by hand.
Step 5 – Add Stitch Types
Now assign stitch types.
- Fill stitch for large areas
- Satin stitch for borders
- Running stitch for lines
Step 6 – Set Thread Colors
Choose colors that match your design.
Most tools have built-in color palettes.
Step 7 – Preview the Design
Check your work.
Look for:
- Gaps
- Overlaps
- Wrong stitches
Fix any issues before saving.
Step 8 – Export as VP3
Save the file in VP3 format.
Now your design is ready for the machine.
Common Mistakes to Avoid
Using Low-Quality Images
Bad images give bad results. Always use clear images.
Ignoring Stitch Direction
Wrong stitch direction can ruin the look.
Too Many Colors
More colors mean more thread changes. Keep it simple.
Skipping Preview
Always preview your design. It saves time and fabric.
Tips from Real Experience
Start Simple
Do not try complex designs first. Begin with basic shapes.
Practice Often
Practice makes you better. Try small projects daily.
Learn Your Software
Each tool is different. Spend time learning it.
Test on Scrap Fabric
Always test your design before final use.
Benefits of Using Modern Tools
Saves Time
Auto features reduce manual work.
Better Accuracy
Software gives clean stitch paths.
Easy Editing
You can fix mistakes quickly.
Professional Results
Even beginners can get good output.
Is Free Software Good Enough?
Pros of Free Tools
- No cost
- Good for learning
- Easy to access
Cons of Free Tools
- Limited features
- Less control
- Lower quality output
Final Thought
Free tools are fine for beginners. But paid tools give better results.
How to Choose the Right Tool
Check Your Budget
Pick a tool that fits your budget.
Know Your Needs
Simple designs need simple tools. Complex work needs pro tools.
Look for Support
Good support helps you learn faster.
Try Before You Buy
Many tools offer free trials. Test them first.
Final Thoughts
Converting JPG images into VP3 files may seem hard at first. But with the right tools and steps, it becomes easy.
From my own work, I can say this: patience is key. Take your time. Learn step by step. Use good images. Test your designs.
Modern tools have made this process much simpler. Even beginners can create great embroidery files now.
Keep practicing. Keep learning. Soon, you will be able to turn any image into a clean and stitch-ready VP3 file.